How To Harvest Green Beans at the Right Time for Peak Flavor and Texture!
Ready to learn how to harvest green beans? There are several factors to consider when harvesting green beans. You'll get the best flavor and texture if you pick you beans at just the right time.
You should usually try and harvest your beans when the plants are dry. Let the morning dew evaporate before harvesting. If it rained the night before, wait until the plants are mostly dry before trying to pick green beans. Even if you have to wait an extra day or two, the beans should be find holding on the plant until you're ready and the plants are dry.
The bean pods do not need to reach a certain length before harvesting them. Some of the pods will be long and thin, others will be short and fat. The size variance will not affect the flavor of the green bean. The more important factor is texture.
How To Harvest Green Beans Step By Step
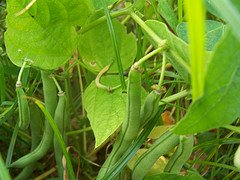
The green bean pods should be firm, crisp, and show no visible bulges. A bulge will indicate that the green bean is over-ripe. It will still taste good but might have a limp texture. A perfectly ripe green bean will make a snapping noise when broken into pieces. This is why some folks call green beans "snap beans".

As the plants will continue to produce green beans over a long period of time, great care should be taken to not damage the plant when harvesting green beans. Use one hand to hold the stem and use your other hand to pick the bean. The blossom end of the stem will usually still be attached to the bean after you pick it. If you don't hold the stem, you risk breaking off other blossoms or branches or yanking the whole plant out of the ground by the roots. Take care of your green bean plants and they will take care of you.
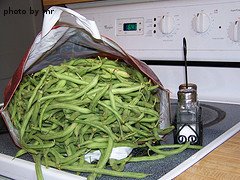
Some people collect their beans in bags, others use baskets or plastic containers. We typically use old grocery bags
After harvesting green beans, store them on the kitchen counter with the stems on. Once you remove the stems, keep them in the refrigerator. If you're going to wait a few days before eating them, just leave the stems on and keep them in the fridge until the day you are ready to use them. Then you can remove the stems.
The stems usually snap off easily. The long, fibrous strip that runs the length of the pod should also be removed. Some varieties of green beans do not have this fibrous strip. The beans can then be snapped into any size you like or left whole.
If you want to wait more than a few days before eating your freshly picked beans, blanch them in boiling water for 3 minutes. Then plunge the beans into ice water for 3 minutes. This will help the beans retain their bright, green color. Place the cooled beans in an air tight bag and put them in the freezer. They will keep for up to 1 year.
Our favorite way to store beans is to can them. We put up 50+ quarts per year and during the harvest season, our pressure canner is constantly working. We pack clean jars with fresh beans that have been rinsed and drained. We try not to wait more than a day or two after harvesting before canning green beans. If you do need to wait a day, just leave the beans whole and snap them right before you wash them and pack them into the jars. We find that if you leave them whole, they taste a little fresher. Once our raw green beans are packed into quart-sized jars, we pour boiling salted water over the beans and then attach the lids and rings and process in a pressure canner according to the manufacturer's instructions.
Here's some canning jars if you're interested...
If you want dry shell beans, just leave the beans on the plant until they turn brown and dry out. When they are ready, you should be able to gently shake the pod and hear the beans rattling around inside. You can then pick the pods, shell the dried beans and store them in an air tight jar, bag or other container. We typically store our dried beans in ziploc bags in our pantry if we're going to eventually eat them. If we're going to plant the dried beans, we keep them in a sealed jar in the fridge with a few grains of rice to absorb whatever moisture might still be left in the beans.
After the growing season is over, pull the green bean plants up by the roots and add them to your compost pile.
Now that you have a bunch of green beans, you should be ready for a few recipe ideas...

Click here for green bean recipe ideas
Click here to move from our How To Harvest Green Beans page to our Growing Green Beans main page
Click here to return to our Home page