How To Save Bean Seeds
Ready to learn how to save bean seeds? You've come to the right place. The first step in saving bean seeds is to make sure you are getting them from a well-established heirloom variety so you'll have the best chances at success. There are lots of heirloom bean varieties available to choose from. For pole beans, the Kentucky Wonder Pole is probably the most common. For bush beans, the Blue Lake 274 variety is one of the more commonly grown. Early Bush Italian is a common heirloom variety of flat bean, while Purple Queen is a common heirloom purple bean. Our favorite heirloom is Calima, which is a French filet type of bean that is nice and thin when picked early, but also works great as a canning bean if you wait a few extra days to harvest. This results in longer, thicker beans.
Dedicated Plants for Saving Bean Seeds
A good method for saving bean seeds is setting aside a few plants that will be used only for producing seed. Just to be safe, we plan on each seed plant producing approximately 30-50 bean seeds. So, if we want 300 seeds for next year, we set aside 10 plants that we don't harvest from until after the pods have dried. This works well for us, especially because we like to grow a couple of different varieties of beans every year. If we're trying out a different heirloom variety for the first time, we might only set aside 1-2 plants, just because we're not 100% certain that we'll want to grow it again next year. For our standard varieties that we know we grow year after year, we set aside as many plants as we think we'll need to produce enough seed for the next growing season.
How To Save Bean Seeds Step By Step

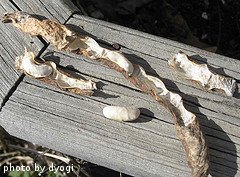
For best results, you want to leave the beans on the plant until they dry out. The pods will turn brown and brittle and you'll see bulges in the pod where each bean seed is. When you shake the pod, you should be able to hear the hardened seeds rattling around inside. At this stage, you can go ahead and pick the beans and bring them inside to dry out a bit more. Be careful when picking the pods as they sometimes use this opportunity to burst open and spill the beans onto the ground. Also, when harvesting, make sure to place the beans inside a bag or other container that doesn't have any holes as inevitably, there will be lots of bean seeds rolling around on the bottom. This is because the pods are just incredibly brittle and inevitably break open. While we use old grocery bags to harvest our regular green beans, we switch to a plastic container to harvest the dried beans. We typically place the container underneath the pods we're going to harvest, just in case they decide to burst open before we get them contained.
Once you've picked the dried beans, you can then remove the bean seeds from the pods. We like to bring the beans inside the house and take them out of the pods there, just because it's more comfortable. We then take the busted up pods and toss them in our compost pile.
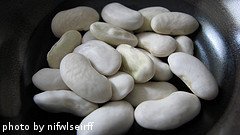
After you've removed the bean seeds from the pods, you can spread them out on a baking sheet lined with parchment paper and put them in a dry spot in your house to let
them air dry for another couple of days. We keep ours out of the kitchen because it tends to be a bit more humid than other parts of the house. You want the seeds to dry out enough so that they are hard
and shriveled up a bit. Then you can then put the seeds inside an
envelope and store them in a jar in your refrigerator, depending on how many seeds you are saving. We typically save our bean seeds in sealed jars just because we usually are saving several hundred per growing season. Make sure you
label the envelope or jar so you know what seeds it contains. Lots of times, bean seeds look the same so it's best to keep track of the different varieties you are saving from the beginning. If you are
saving lots of different seeds but not a big quantity, several envelopes can fit inside one,
quart-sized jar. It's also a good idea to put a tablespoon of dry rice
at the bottom of the jar just to absorb any moisture. Saved bean seeds will usually be viable for a couple of years, but the germination rate will be highest the year after you save them.
We hope you've enjoyed learning about how to save bean seeds. Click on the following links to learn more about growing green beans.

Click here to learn about planting green beans
Click here for information about fertilizing and watering green beans
Click here to learn about harvesting green beans
Click here to move from our How To Save Bean Seeds page to our Growing Green Beans main page
Click here to go to our Home page