How To Save Butternut Squash Seeds
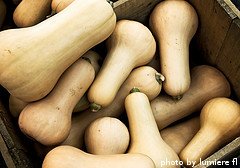
Want to learn how to save butternut squash seeds? You've come to the right place. Before saving butternut squash seeds, you'll first need to make sure you are dealing with an open-pollinated or non-hybrid variety, otherwise known as an heirloom. If you save seeds from a hybrid variety and replant them, you likely won't get any squash. Most of the time, the result is a lush plant that doesn't produce fruit. If it does produce squash, you probably won't be happy with the size or quality. Waltham is probably the most commonly grown heirloom butternut squash variety, although several others are available.
How To Save Butternut Squash Seeds Step By Step

Once you know you have an heirloom variety, the next step is to harvest
the seeds. It's best to wait for the butternut squash to fully mature
and then some before you remove it from the vine. Typically, if you are
harvesting seeds from a squash, you want it to be over-ripe, to the
point where it is soft and mostly inedible. The reason for this is
that you want the seeds to be fully developed and mature. Many times
the seeds you find in a perfectly ripe squash are still a bit immature.
Once
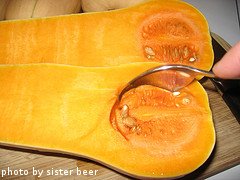
you have an over-ripe heirloom butternut squash, cut it open lengthwise
and scoop out the seeds and put them in an empty bowl. Using your
fingers, remove most of the pulp from the seeds. Then, fill up the bowl
with water and let the seeds settle for a few minutes. The healthy,
viable seeds will sink to the bottom and the dead seeds and most of the
pulp will float to the surface. When the seeds and pulp have separated
themselves, use a slotted spoon to remove the dead seeds and pulp. Then
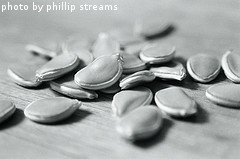
you can put the good seeds on a paper towel to drain. Once most of the
moisture is off, the seeds should be creamy white and ready for drying.

The next step in saving butternut squash seeds is to dry them out a bit. There's a couple of ways you can do this. We've found the easiest way is in a conventional oven. First, spread the seeds in a single layer on a baking sheet that is lined with parchment paper. Place the baking sheet on the middle rack of your oven, close the door and turn on the oven light. DO NOT TURN ON THE OVEN. The ambient heat from the light is enough to dry out the seeds in about 36-48 hours. When they are dried enough, the seeds will be harder and they'll have shrunk a little bit.
You can
also save butternut squash seeds by using a food dehydrator. Spread the
seeds out in a single layer on the dehydrator tray. Depending on the
model, you may need to put the seeds on foil so they don't fall through
the trays. Drying times vary depending on the dehydrator model, but the
seeds are usually dry enough in a day or two. The key is to use the
lowest available setting and keep the seeds as far away from the heat
source as possible. You'll know when the seeds are dried enough when they harden and shrink slightly.
A third option, and possibly the easiest, for saving butternut squash
seeds is just letting them air dry. Spread them in a single layer on a
baking sheet or foil or parchment paper and put them in a dry place, preferably away from
the humidity of a kitchen. In most cases, the seeds will dry out enough
in a few days. Again, you want them to harden up and shrink a little
bit.
After you're done saving butternut squash seeds, you can then put the seeds inside an envelope and store them in a jar in your refrigerator. Make sure you label the envelope so you know what seeds it contains. This is especially true if you are saving different varieties of butternut squash, or any other winter squash for that matter. Many winter squash seeds look very similar, so make sure to keep track of which seeds came from which squash and then clearly label the envelopes you keep them in. If you are saving lots of different seeds, several envelopes can fit inside one, quart-sized jar. It's also a good idea to put a tablespoon of dry rice at the bottom of the jar just to absorb any moisture.
Now that you know how to save butternut squash seeds, click on the following links to learn more about growing butternut squash.

Click here to learn about planting butternut squash
Click here to learn about watering and fertilizing butternut squash
Click here for information about harvesting butternut squash
Click here to go to our Home page